A broadcast allows you to send one message to many recipients defined in a contact list. Before sending a broadcast message you first need to create a contact list.
How to use the SMS broadcast
click on the broadcasts tab:
 Fig2: Broadcast Messages
At the top, a summary of the messages sent is displayed in their current status;
Total messages - This is the total number of messages sent over a given period
Delivered messages - The number of messages that were successfully delivered to recipients
Pending messages - These are messages that have not yet been sent to the recipients
Failed Internally - Sending of the messages failed due to an internal error
Failed externally - The messages were successfully pushed to the carrier but delivery failed at the carriers end
Creating a new broadcast
Click on the New Broadcast button:
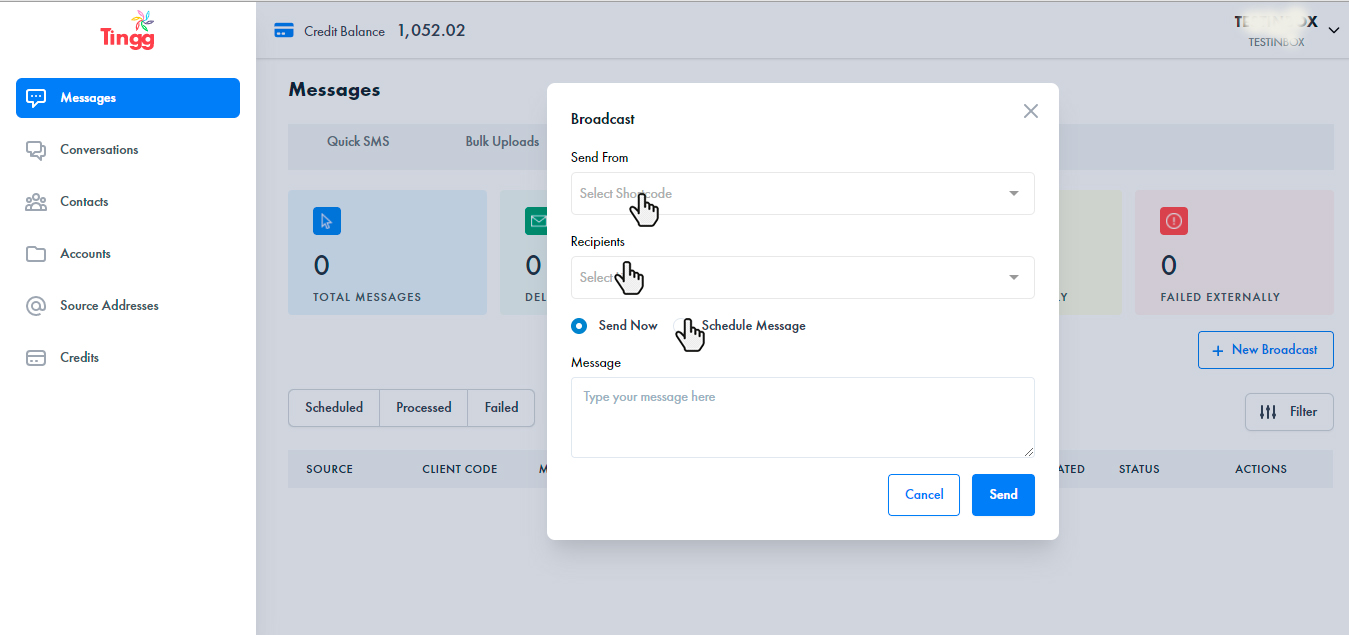 Fig2: New broadcast
New broadcast form
Send from -This is the source address that the messages will be delivered from.
Recipients - Click on the recipients option to select s contact list that the messages will be sent to. Click here for information on how to create and manage contact lists.
Send now - Send the messages as soon as the broadcast upload is complete.
Schedule message - The schedule message offers two options on how the message sending will be handled:
- Send time - This is the time the messages will start being sent.
- Expiry time - Once the expiry time is reached no message will be sent from the upload. This is useful in ensuring the messages are only sent during the appropriate time window.
Message - On the message box enter the message that will be delivered to the recipients defined in the contact list
After entering all the details click on the send button
Viewing messages sent
A the bottom of the page is a table displaying all the messages sent.
1. You can toggle between displaying messages in a particular status i.e. Sent, Delivered, Pending, Failed
2. The results are then displayed in the table.
3. Use the Filter button to refine the search results.
 Fig3: Filter
Filter options
Start date - This is the date from which you want the messages to start being displayed
End date - The date which the last message should be displayed
Destination - The recipients phone number
Source - The source address used to send the message
Status - Filter using the status of the messages e.g. Sent, Failed
If an error is encountered during the file upload process reach out to servicedesk@cellulant.io
Was this article helpful?
That’s Great!
Thank you for your feedback
Sorry! We couldn't be helpful
Thank you for your feedback
Feedback sent
We appreciate your effort and will try to fix the article